You will require this information when you would like to create a blog section and populate it with blog posts.
...
- Navigate to the home page of your website (make sure that you are logged in, and that you have the appropriate editing privileges).
- Use the 'Add new' menu to add a new 'Section'.

- Name the section, and save the form.
- Once you have saved the section, you will be looking at your new section.
- Using the dropdown menu from your account name, in the top right of the page, on the edit bar, select 'Manage behaviours'

- You will now see a page with a list of available behaviours , check the box next to in a dropdown field, select 'Blog section behaviour'
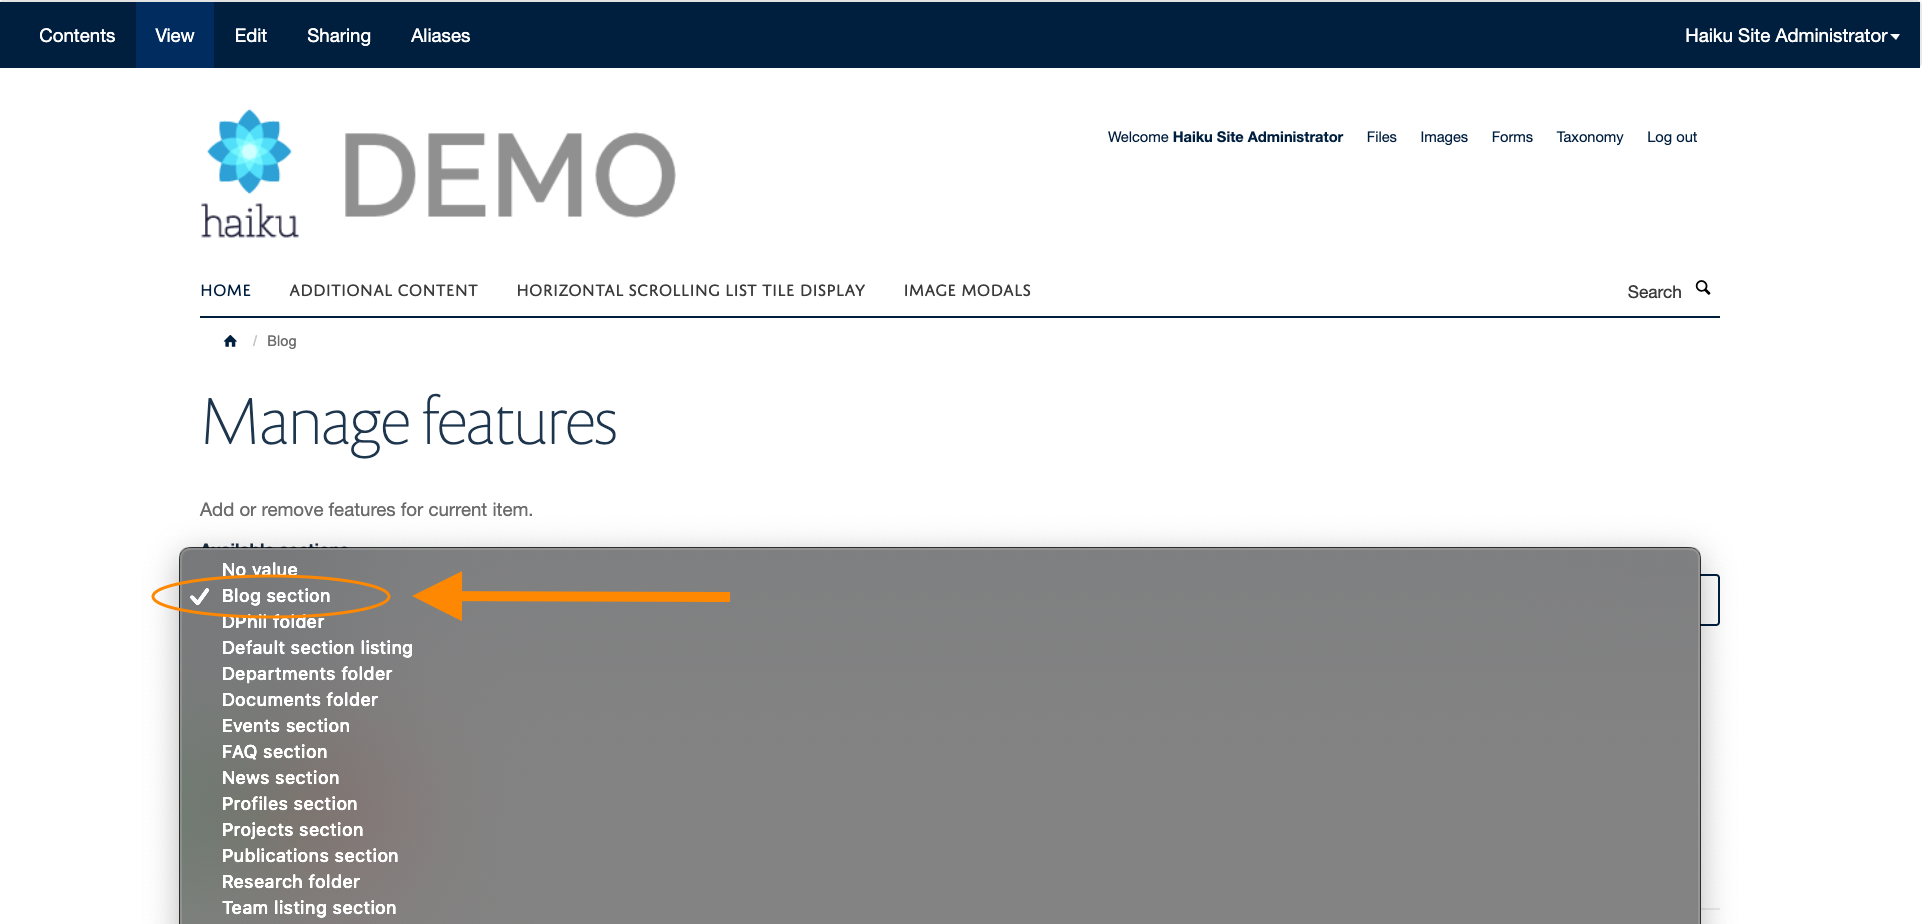
- Scroll down and click 'Save' - the page will reload, and a notice will appear at the top confirming that the changes have saved, you can now navigate back to the newly created section, to begin adding content.
...
- Archive portlet
- To add a protlet that will show an archive of the blog posts, broken down by month and year, firstly navigate to your blog section landing page.
- Using the dropdown menu from your account name on the edit bar, select 'Manage portlets'
- Portlets on the blog section are 'Primary portlets'
- Using the 'Primary portlets' 'Add new' drop down, select 'Archive'
- Once you have selected the 'Archive' , it will take you to a page where the only field that you can edit, is the title of the portlet. Set this to what you would like it to be, and save the form.
- The archive portelt will now be added to the blog section. Note - it will only display once you have some blog posts in the section.
- 'Categories' portlet
- To add a protlet that will show a categories filter of the blog posts, firstly navigate to your blog section landing page.
- Using the dropdown menu from your account name on the edit bar, select 'Manage portlets'
- Portlets on the blog section are 'Primary portlets'
- Using the 'Primary portlets' 'Add new' drop down, select 'Categories'
- You will be taken to an edit form with the following fields:
- 'Title' - this is the title of the categories portlet.
- 'Display type' - this will default to 'Primary', this is picked up from where the portlet will be located, and should not be changed.
- 'Categories selector' - Using the drop down change this to 'Category type'
- 'Categories type' - Using the drop down, change this to 'Blog post'
- 'Request variable' - This will default to category, and should be left as it is.
- 'Results URL' - Leave this balank, unless you would like a user to be taken to a different page for the results of the search.
- 'Root path' - This should be left blank, unless you have more than one blog section. If you have more than one section, and you only want to display the categories that blog posts in this individual section are tagged with, you will need to provide the absolute URL of the section you are currently adding the portlet to.
- Once you have completed this edit form, save it, and the new portlet will be added to your blog section.
- 'Blog posts' portlet
- To add a protlet that will show a some of the blog posts, by popularity, in chronological order, or selected blog posts, firstly navigate to your blog section landing page.
- Using the dropdown menu from your account name on the edit bar, select 'Manage portlets'
- Portlets on the blog section are 'Primary portlets'
- Using the 'Primary portlets' 'Add new' drop down, select 'Blog posts'
- You will be taken to an edit form with the following fields:
- 'Title' - this is the title of the blog posts portlet.
- 'Posts' - if you want to show only some specific posts in this portlet, simply select them in this field, and shift them from the left box to the right box You can reorder them to show them as you wish.
- 'Visible fields' - you can use this field to select which fields related to a blog psot, show in the portlet.
- 'Categories' - you can define which blog posts show by selecting specific categories, by moving the ones that you would like to display form the left box to the right box. If no categories are moved to the right box, all categories of blog post will display.
- 'Limit' - this field allows you to define the maximum number of blog posts that will be displayed in the portlet at one time.
- 'Sort on' - this field allows you to choose from three different ways of sorting the blog posts:
- 'Date' - this will display the blog posts in chronological order.
- 'Popularity' - this will display the most viewed blog post at the top and the lesser viewed blog posts in order beneath.
- 'Selection order' - you will need to select this option if you have chosen which blog posts you are wishing to display on this page.
Step-by-step guide to create a blog post
- Navigate to your blog section (make sure that you are logged in, and that you have the appropriate editing privileges).
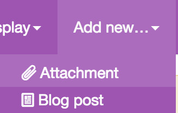
- Using the 'Add new' dropdown menu on the edit bar, select 'Blog post' - you will be taken to the edit interface for the blog post that you are creating.
- There are three tabs on the blog post edit interface. 'Default', 'Analytics', and 'Media'.
Using the 'Default' tab:
Body content fields
This is a title that will be located at the top of the page, and in content listings. This will also define the URL of the item.
'Summary'
This field is for plain text, that will show in search results and listings. This should be populated with a to the point description of what content the blog post contains. Use keywords to get better search results from search engines, and don't make it too long.
'Text'
Enter text into the 'Text' box. You can then use the formatting options to present the text as you would like to, adding images, and other media as well, to create a well structured blog post.
- 'Authors'
- Use this multi selection box to select as many authors as you would like, to attribute the blog post to the author. If you select one author, their name and picture will appear, and will create a link to their profile. If you are attributing more than one author to a blog post, only the first person named will have their picture showing, but links will be made from all of the authors names, to their individual profiles. You can use the up and down arrows on the right side of the multi selection box, to manipulate who is the lead author.
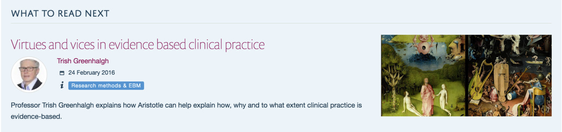
- 'Related posts'
- This multi select box will only be populated, if you already have some blog posts in your blog section. If you don't already have some posts, it will be empty. The function of this selection box, is to allow you to display one or more posts that you would either like to direct the user to after they have read this blog post, or that you think they may find interesting if they enjoyed this blog post. Selecting a related post, will make sure that the selected post is shown in a highlighted box, under the main content of the blog post that you are creating.
- This multi select box will only be populated, if you already have some blog posts in your blog section. If you don't already have some posts, it will be empty. The function of this selection box, is to allow you to display one or more posts that you would either like to direct the user to after they have read this blog post, or that you think they may find interesting if they enjoyed this blog post. Selecting a related post, will make sure that the selected post is shown in a highlighted box, under the main content of the blog post that you are creating.
- 'Categories'
- In this multi selection field, you will see the tags that you have created for the blogs posts on the website, in the taxonomy. You can select as many or as few tags as you like by highlighting them and moving them from the left side to the right side. The tags will show on the blog post, as well as enabling a user to search the blog posts by selecting a category from the list, on the section landing page.
Using the 'Analytics' tab:
- The analytics tab is available for two reasons:
- This will tell you exactly how many times the blog post has been visited. This counter will show every single page visit, including logged in and logged out visits. If you would like to see pure external page views, to be able to accurately judge how blog post is performing to your stakeholders, we suggest that you use your Google Analytics account.
- When you are using the 'Blog posts' portlet, you are able to define whether the portlet lists the posts by date (showing the most recent X number of portlets), or by popularity (number of hits the page has received). The popularity sort order is taken from the number in this section of the edit form. Please note, you are able to change the number in this field. You have the ability to do this, so that you can either reset the counter for any reason you may wish to do so, or you can increase the number in this field, if you want to manipulate the results of the popularity listing.
- The analytics tab is available for two reasons:
Using the 'Media' tab:
...