ALL THIS REQUIRES INTERNET CONNECTIONExam timing is the functionality that allows exam administrators to manage exams automatically with specific timing parameters. The functionality allows administrators to set the amount of time that a user has to sit the exam (including the ability to accommodate reasonable adjustments with the timing able to be configured on a per-user basis, if required), and therefore automatically end the exam for each user at exactly the correct time. With the implementation of exam control, administrators are also able to see more information related to the users that are sitting the exam. The information below details the functionality and how it should be used to control your exams in Practique.
| Note |
|---|
For the exam controls and timing changes to take effect for the user, they must have an active internet connection. |
Step by step how to activate and configure the exam timing functionality:
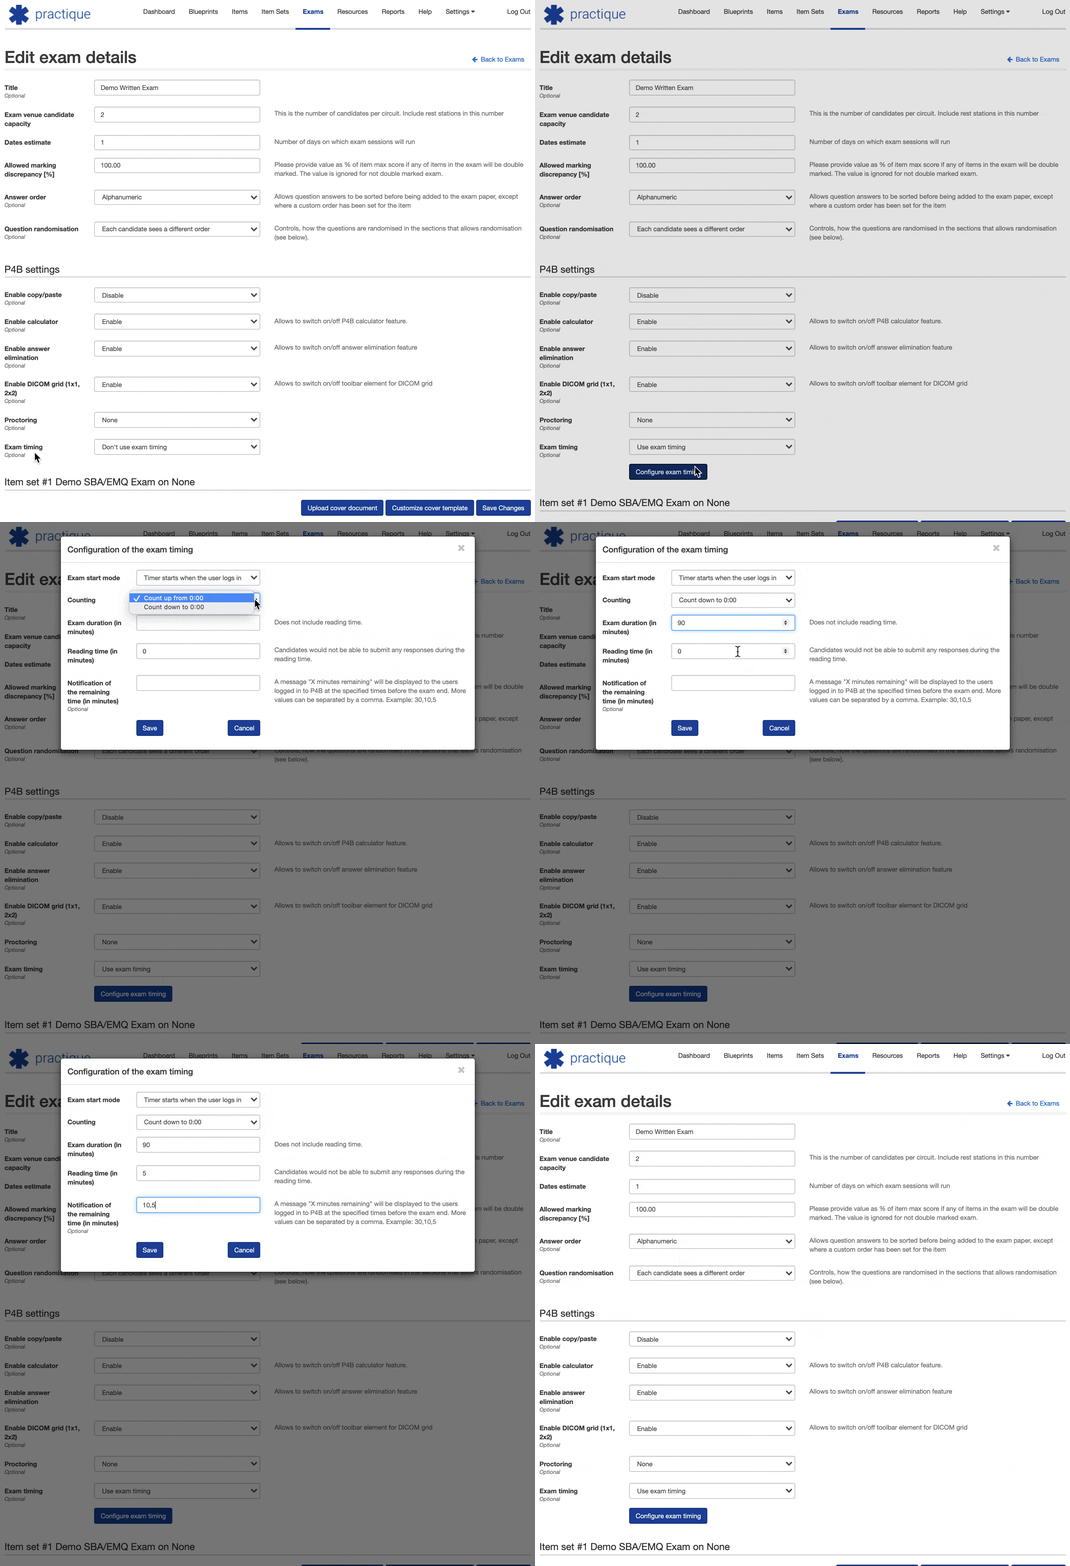
Navigate to the ‘Edit exams details' screen for the exam that you want to manage the settings for.
The ‘Exam timing’ field is in the P4B section of the settings.
Select ‘Use exam timing’ from the dropdown options.
A button to configure the exam timing will then show, select this. A pop-up will appear for you configure the exam timing.
The pop-up has five fields:
‘Exam start mode’ - this field has two options:
‘Timer starts when the exam starts’ - select this option if you would like the exam duration timer to start the countdown for all users when the exam session is started by an administrator. e.g. centrally controlling the time for all users, no matter the time of their login. More commonly used in situations where users are all in one location.
‘Timer starts when the user logs in’ - select this option if you would like the exam duration timer to start the countdown immediately when the user logs in to Practique. e.g. if you are using proctoring with the exam and users will be accessing Practique at different times over a specified time frame.
‘Counting’ - this field has two options:
‘Count up from 0:00’ - select this option if you would like the timer that the user can see to count up from 0:00 to the number of hour/minutes set for the exam.
‘Count down to 0:00’ - select this option if you would like the timer that the user can see to count up from 0:00 to the number of hours/minutes set for the exam.
‘Exam duration (in minutes)' - enter the duration of the exam in minutes. e.g a 2-hour exam is 120 minutes. Note, this should not include the reading time for the exam if any is permitted, see the next field for instruction.
‘Reading time (in minutes)’ - enter the duration of the reading time in minutes. Note, this is in addition to the exam duration defined in the field above. The reading time function will allow users to access the exam and navigate around the questions, they will not be able to answer any questions until the reading time has elapsed, automatically unlocking the exam for the user. This can be set to '0' for not no reading time.
‘Notification of the remaining time (in minutes)’ - define when users will see a warning to advise them how long left of the exam. The message ‘X minutes remaining’ will be displayed in a banner at the top of the P4B page.
Save any changes you have made.
Controlling an exam
that has been set up with the ‘Timer starts when the user logs in’ option
, this is how the administrator can start the exam.
Method one: Starting all users at the same time (not shown in the video).
Use method two for more granular control when starting users.This method is for use if you would like to open the exam for all users in the session to be able to start the exam as soon as they log in.
Complete the setup of the exam, and publish it to devices from the exam preparation screen.
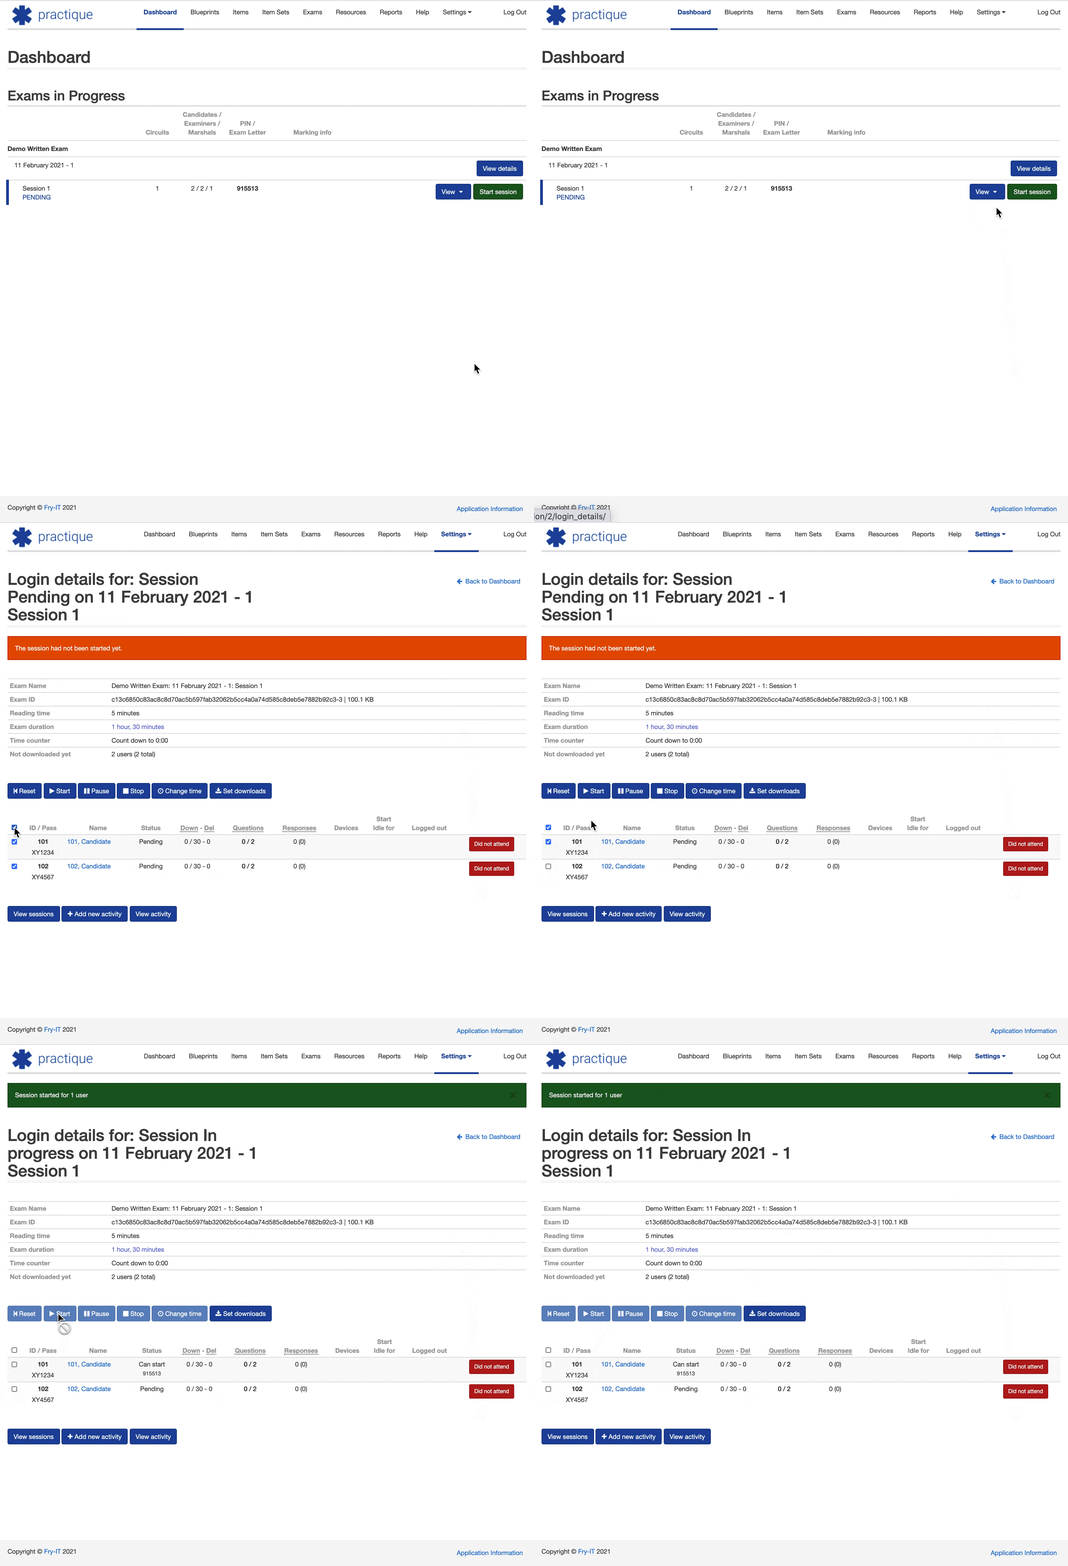
The exam will display on the dashboard.
Select ‘Start session’. This will immediately allow all users allocated to the session to sign log in and start the exam.
This will update the users status from ‘Pending’ to ‘Can start’. The user will then be able to log in and take the exam.
If a user has already logged into and therefore downloaded the exam and they are at the holding screen, they will be entered to start the exam when the session is started, providing they are connected to the internet.
Method two: Selected user starting (shown in the video).
This method is for use if you would like to enable a selection of the users in the session to start the exam, but not all at the same time.
Complete the setup of the exam, and publish it to devices from the exam preparation screen.
The exam will display on the dashboard. Do not start the session at this time.
Go to the ‘View logins’ page.
Use the selection field to choose which users you want to start the exam. Note you can use the select box at the top of the table to select all users in bulk. You have the ability to deselect certain users before carrying out any further actions.
Once you have the users selected, the exam timing controls at the top of the page will change from greyed out to be usable.
Select ‘Start’. This will update the users status from ‘Pending’ to ‘Can start’. The user will then be able to log in and take the exam.
The ‘View logins’ screen - This page updates automatically
Buttons:
‘Reset’ - PLEASE CAN WE MOVE OR CHANGE THIS SOMEHOW (permission??)
The reset action allows administrators to reset the exam for the selected user(s). This action will logout the selected user(s) and optionally delete all of the submitted responses. You will require an administrator password to carry out this action. - DOES TH?IS GO BACK TO TIME OR READING TIME? Think about amending the timing when you do this.
‘Start’
The start action allows administrators to start the session for the selected user(s), and also to restart a user after they have been paused for any reason.
‘Pause’
The pause action allows administrators to pause the selected user(s) at any point during the exam, providing the user has an active internet connection.
‘Stop’
The stop action allows administrators to end an exam for the selected user(s). This will prevent the user from submitting any more answers, save all their current answers to the server, and then log them out. THE USER WILL NOT ?BE ABLE TO LOG BACK IN UNLESS THEY ARE RESET - add this correct. they need to be reset and then restarted. give screen shot for user - you need to stop DNA’s to close the session.
‘Change time’ (ONLY VISIBLE WHEN USING EXAM TIMING, not available using exam controls)
The change time action allows administrators to increase and/or decrease the amount of time the selected user(s) have for the exam. This action allows administrators to change the amount of time for both the reading time and the exam duration time at any point that either is active. The users timer will be updated respectively.
‘Set downloads’
The set downloads action allows administrators to set the number of downloads of the exam the selected user(s) are allowed.
Statuses - is this all of them?
Pending
Before the session is started, the screen will show the ‘Status’ of all users as ‘Pending’. Even if a user logged into the P4B interface, they would not be able to access the exam. The exam will download to the user's device. The user will be held at a screen that informs them the exam has not been started yet, and they should wait. Issue here - see the screen - what if they are not using proctoring (which is turned off for this demo - see above)
Can start
Once the session is started for a user (through either method), the screen will show the ‘Status’ of the user as ‘Can start’. Under the status ‘Can start’ the PIN number for the exam is displayed, which can be provided to the candidate for them to start the exam if they are offline but have already downloaded the exam when the session is started.
In progress
Once a user logs in to start the exam, the screen will show the ‘Status’ of the user as ‘In progress’, and the row with the user information will change to green. (it may not if they lose connection when logging in)
Paused
As an administrator, you can pause the exam selected user(s) by selecting them and then selecting the ‘Pause’ action at the top of the page. This will pause the candidate, locking the exam and showing a warning to them that the exam has been paused by an administrator. The candidate must have an active internet connection for this control to work. To start the user(s) again, select them and then select the ‘Start’ function at the top of the page.
Complete
Either the user has finished the exam and logged out, or an administrator has used the ‘Stop’ action to end the exam for a user. The user cannot log back in to the exam, unless restarted ****
USER SCREENS
When exam timing has been set up with the ‘TimerControlling an exam that has been set up with the ‘Timing starts when the exam starts’ option.
This method is used if you would like the exam start and end time to be exactly the same for all users. This method will most likely be used in the physical delivery of an exam when the users will be in one or multiple physical locations. The exam timing clock will run for the specified length of the exam, from the moment the session is started. Any users starting to take the exam after the start time will not receive the full time for the exam unless they have their time manually changed after the exam has begun.
Complete the setup of the exam, and publish it to devices from the exam preparation screen.
The exam will display on the dashboard.
Select ‘Start session’. This will immediately allow all users allocated to the session to log in and start the exam.
This will update the users status from ‘Pending’ to ‘Can start’. The user will then be able to log in and take the exam.
If a user has already logged into and therefore downloaded the exam and they are at the holding screen, they will be entered to start the exam when the session is started. If using this method of exam timing, we recommend that all users are logged in and being held at the screen telling them the exam has not started yet. As soon as the session is started they will be entered into the exam at the same time.
The exam will end for all users at the same time unless any specific users have been granted reductions or extensions to the time allowed for them to take the exam using the ‘Change time’ action.
USER SCREENS - IN PROGRESS.
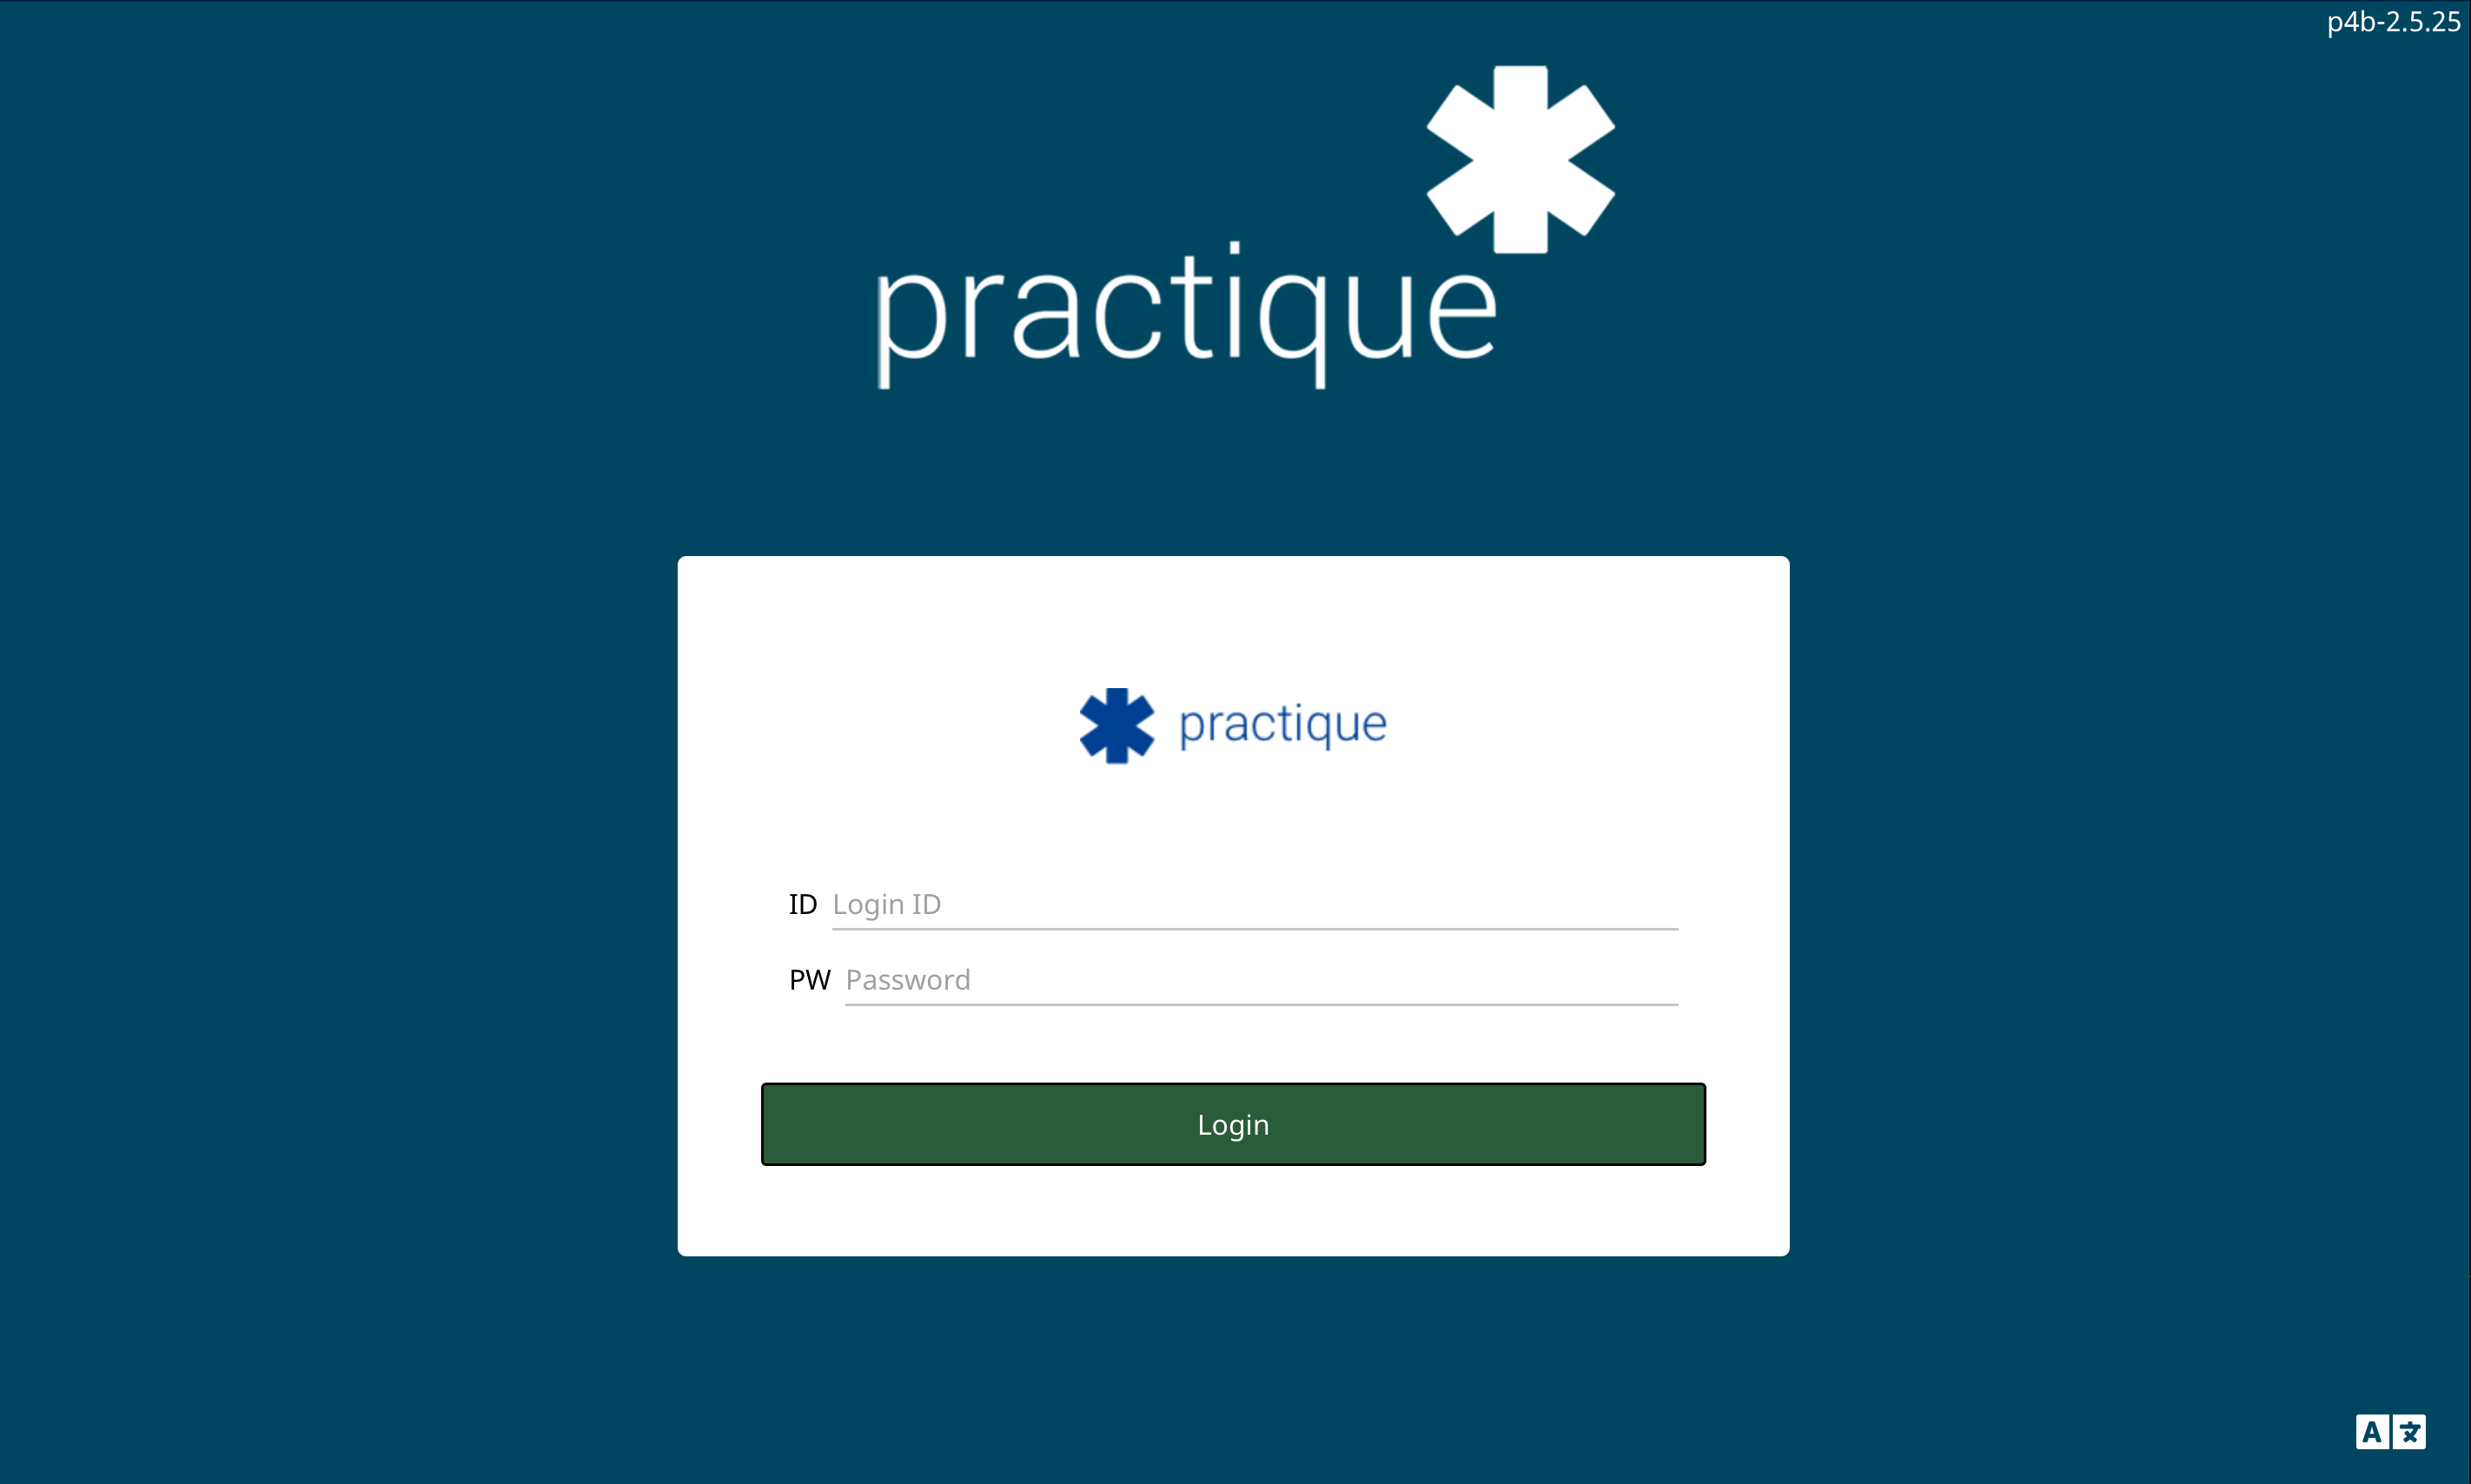
Practique user login screen This is the screen that loads for users when they first access Practique on the P4B URL e.g. https://<organisation-name>.practique.net/html5 | |
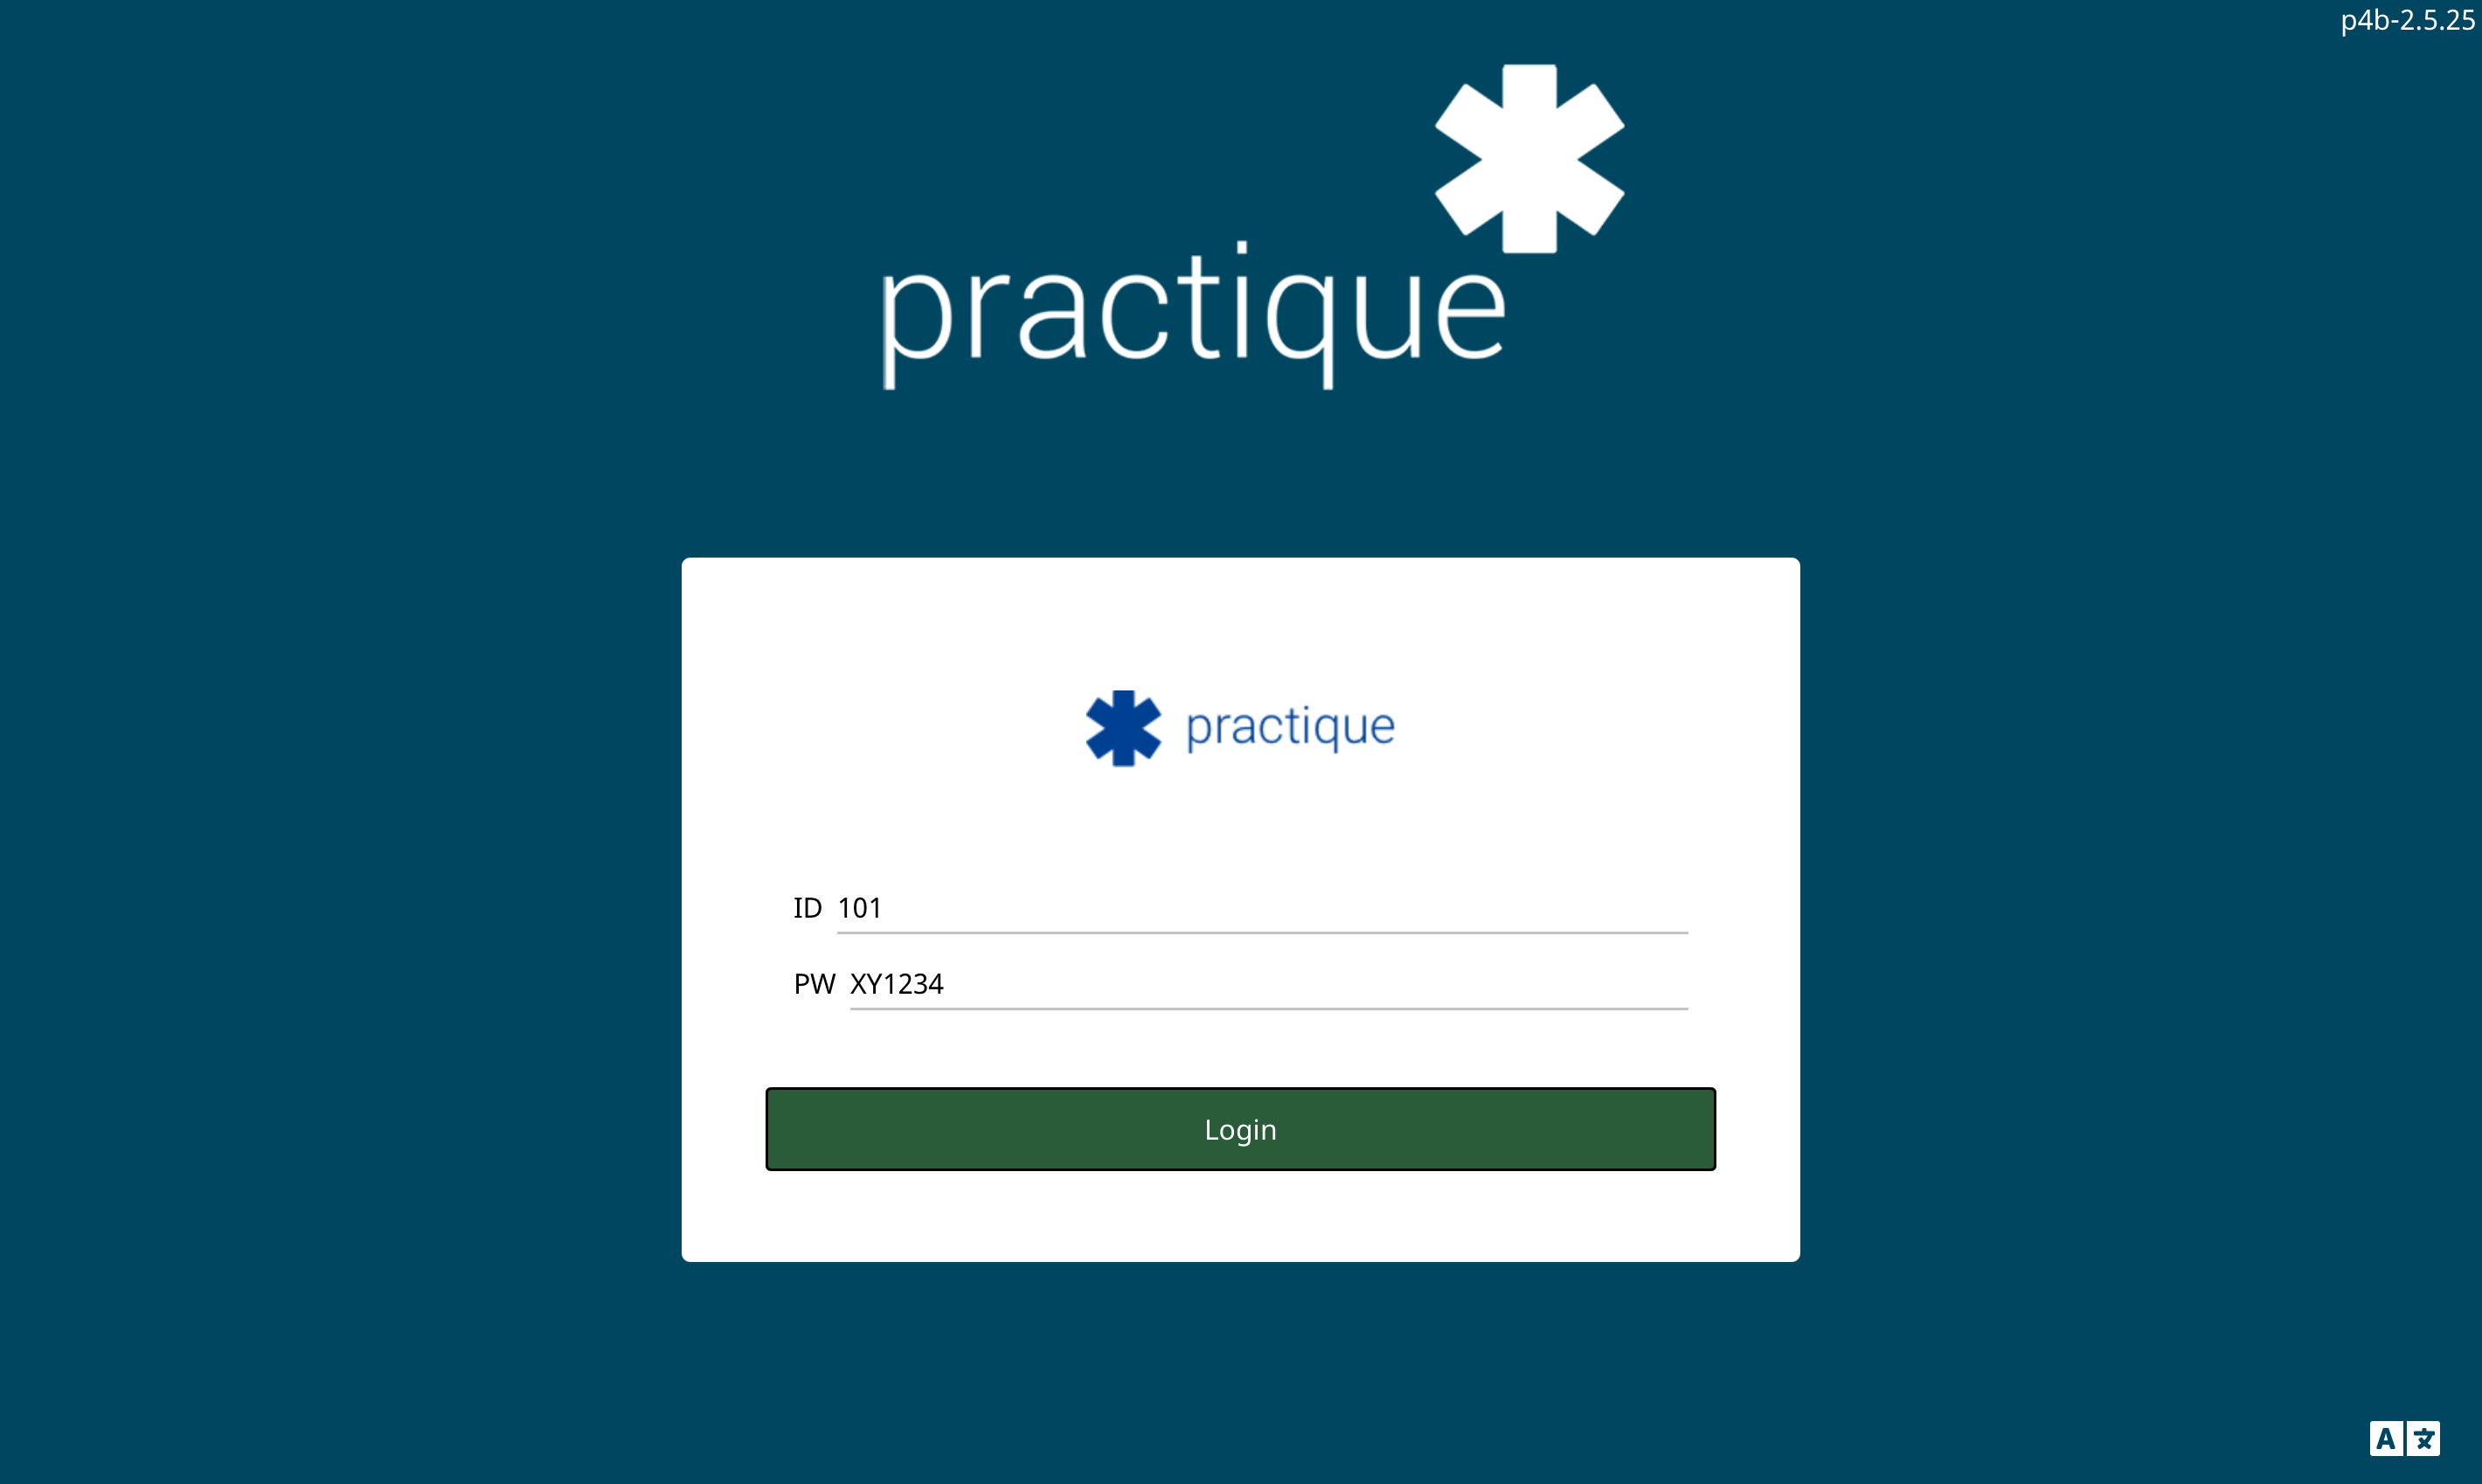
Practique user login screen with ID and Password fields filled (these are both case sensitive) | |
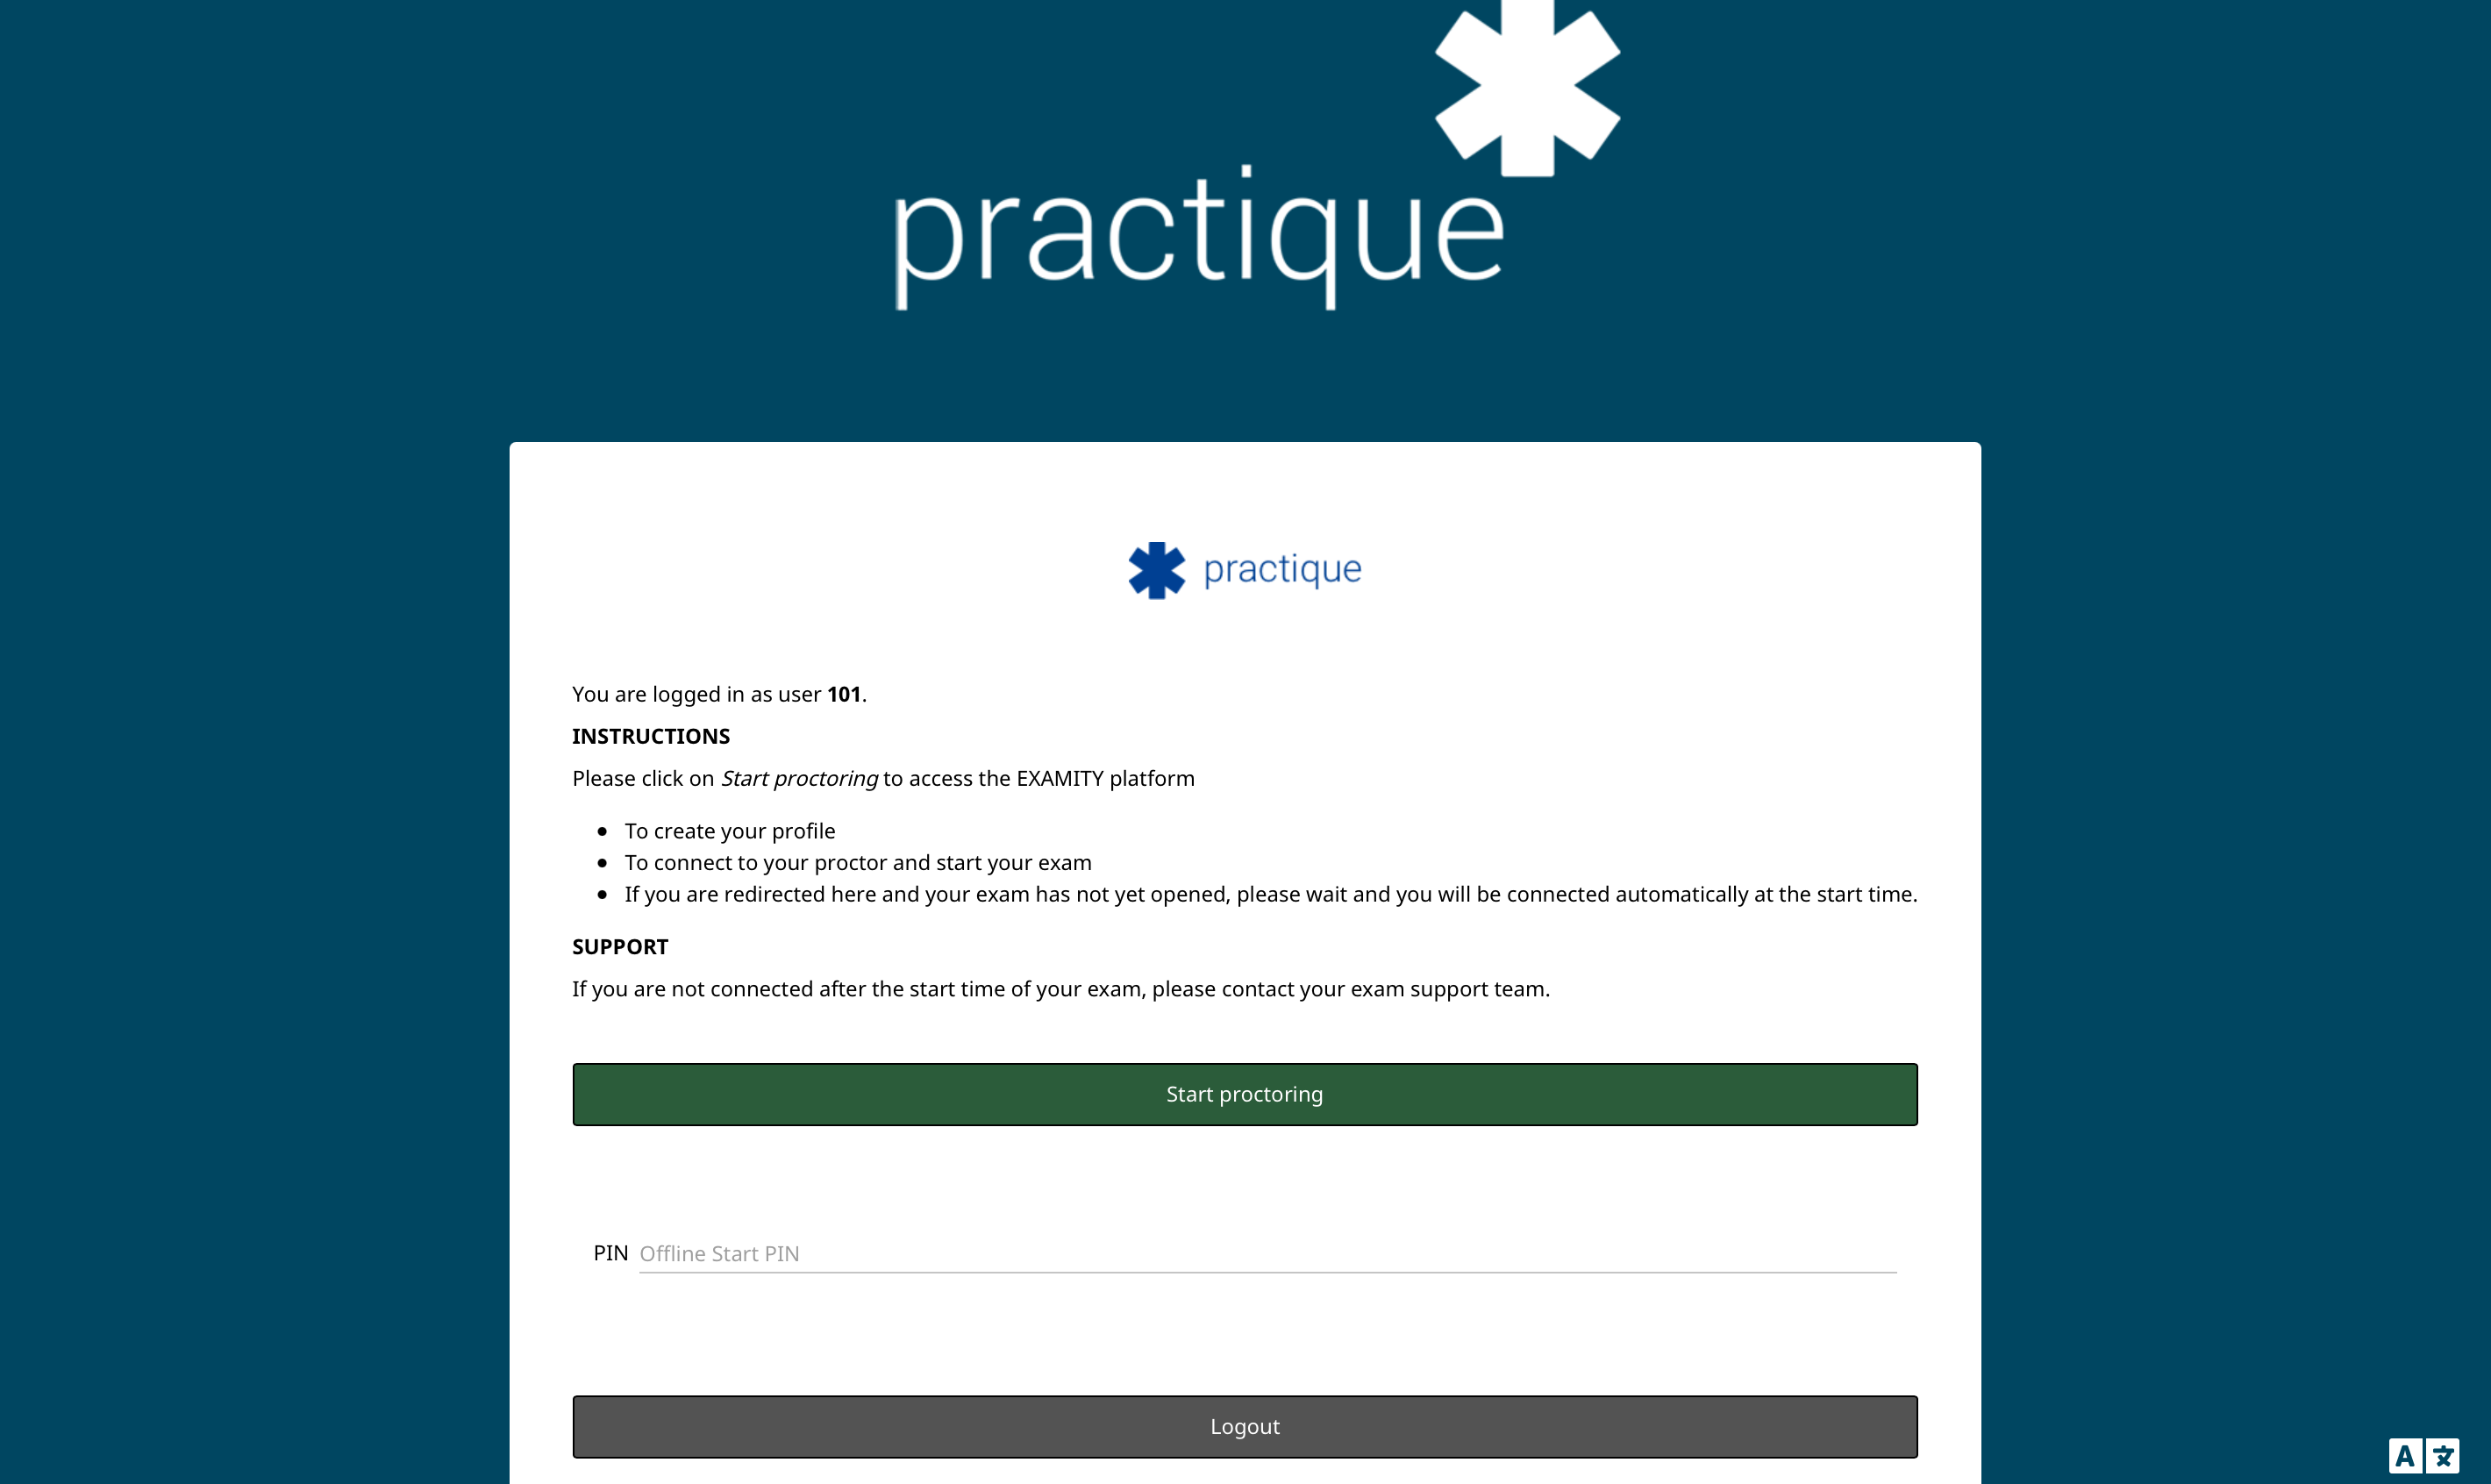
User holding screen A user will see this screen once they have logged into the exam, and the exam has downloaded to their device, but the exam has not begun yet. If the exam has begun already, the user will bypass this screen. If the user is held at this screen, they will start the exam when the session is started. If proctoring is enabled, and Examity is the chosen provider, users will be required to select the ‘Start proctoring’ option in order to start the proctoring process, and then be entered into the exam. The PIN field is available for the user so that an administrator can provide them with the PIN number to decrypt the exam, if the user is offline when the centrally controlled exam is started. | |
The candidate can see the timing information in the menu bar. Here they have 1 minute of reading time. In reading time they can review questions but not answer. | |
The exam time is shown and will now count down - if there is no reading time the counter will have started as the candidate accesses the exam. If a time warning has been set this will appear at the set time e.g. when there are 10 minutes remaining. | |
The Exam time is up and the candidate is instructed to submit their exam. At this point they can no longer access the exam / edit or add answers. The candidate is informed that their answers have been submitted to the server - this resolves previous issues where candidates were unsure of this. If the candidate is off line and they have answers which are not submitted they will be informed and should refer to the off line troubleshooting candidate guidance. | |
This candidate has clicked on finish exam before the exam time is up. They will see a prompt which will inform them of the status of their answers - have they been submitted, and how many questions are unanswered. They can continue and answer any outstanding questions by clicking on “continue exam” If they choose to leave they can click on “submit exam” - this will finish their session. | |
Exam timing has been set up with the ‘Timing starts when the user logs in’ option, this is how the user will start their exam.
When the user logs into the P4B interface through their web browser, the exam will download to their device, the user will be immediately taken into the exam, and the exam will start . ([prpovodogn the sessionis provided the session has been started). If there is reading time, this will be added to the ‘Time remaining' information at the top of the screen. There will also be a banner at the top of the screen to let the user know how long the reading time is if this is used for the exam. Once the reading time has elapsed, the exam will be unlocked so the user can , a banner will show the user how long is allowed for the exam and they will then be able to submit answers.
Notes:
what if they are offline? Can’t download the exam and so can’t get anywhere?
ADD FINISH SCREEN DETIALS
If the user logs in but the exam session has not been started, they will be held at a screen
The exam will download to the user's device. The user will be held at a screen that informs them the exam has not been started yet, and they should wait. Issue here - see the screen - what if they are not using procotring (which is turned off for this demo)
Finish exam process/……
The view login screen information
Checkbox - Top checkbox to select users in bulk. Checkbox per row to individually select each user.
‘ID/Pass’ - Top row information is the ID of the user. Bottom row information is the users password.
‘Name’ - Top row information is the name of the user. Bottom row information is the time remaining followed by the total time allowed in brackets. This changes depending if the user is in the reading time or exam time.
‘Status’ - Top row informaiton shows status of user in the exam. Bottom row information shows the PIN for the exam.
‘Down - Del’ - First number (e.g. 1/30) is how many downloads a user has used of the number available to them. The number after the hyphen is how many times the exam has been deleted from the device.
‘Questions’ - Top row information is the number of at least partially answered questions. Does not include the rejected responses. Bottom row information is which question the user is currently looking at on their screen.
'Responses' - Number of received responses including amendments (number of rejected responses).
‘Devices’ - Shows the devices and browser with versions that the user has downloaded the exam with, one per line.
‘Start / Idle for’ - Top row information is the time the user logged in to start the exam. Bottom row information is the amount of time the user has been idle for. This is how long a user has not interacted with the system since last click - only activated after first interaction *****
‘Logged out’ - The time the user finished and logged out of the exam
Issues:
This page does not show you the settings that you have configured for the exam timing. It says it is enabled, but that’s all you can find out once you have pushed it to devices, unless I am missing something? I think we should display the settings. https://demo.beta.practique.net/diets/diet/5/edit/?exams
Terminology on the above page is odd when not is use ‘not set’ rather than disabled. Also, this still actually shows the timing controls on the candidate list when the exam timing is not in use…..
Is it ever off? Is this where it turns into exam control?
What does ‘Start Idol for’ mean on the logins table needs to be made clearer?
Sign in /log in consistently
Troubleshooting and ideas section
Long running exams, candidates logging in and out - test it!?!
Imperial 3 hours within a window
Things to note:
